Lighting, Part 2
Listen to this lesson.
While you may not always be able to control the lighting, you can control where you are in relation to the light to achieve the same effect.
Let’s expand on our lighting lesson from earlier in the course and go deeper into the lighting itself: how to best utilize it, artistic representation, and lighting design.
And while there are lots of technical terms, artistic ambiguities, and subjective preferences, it all comes down to being intentional with your choices and understanding how to turn those choices into a finished photo.
We’ve previously discussed the differences in hard vs. soft and specular vs. diffuse, so let’s get into why we might want one over another. The quick and easy answer that gets thrown around is “use the softest light possible,” but in reality, that’s often not the best choice.
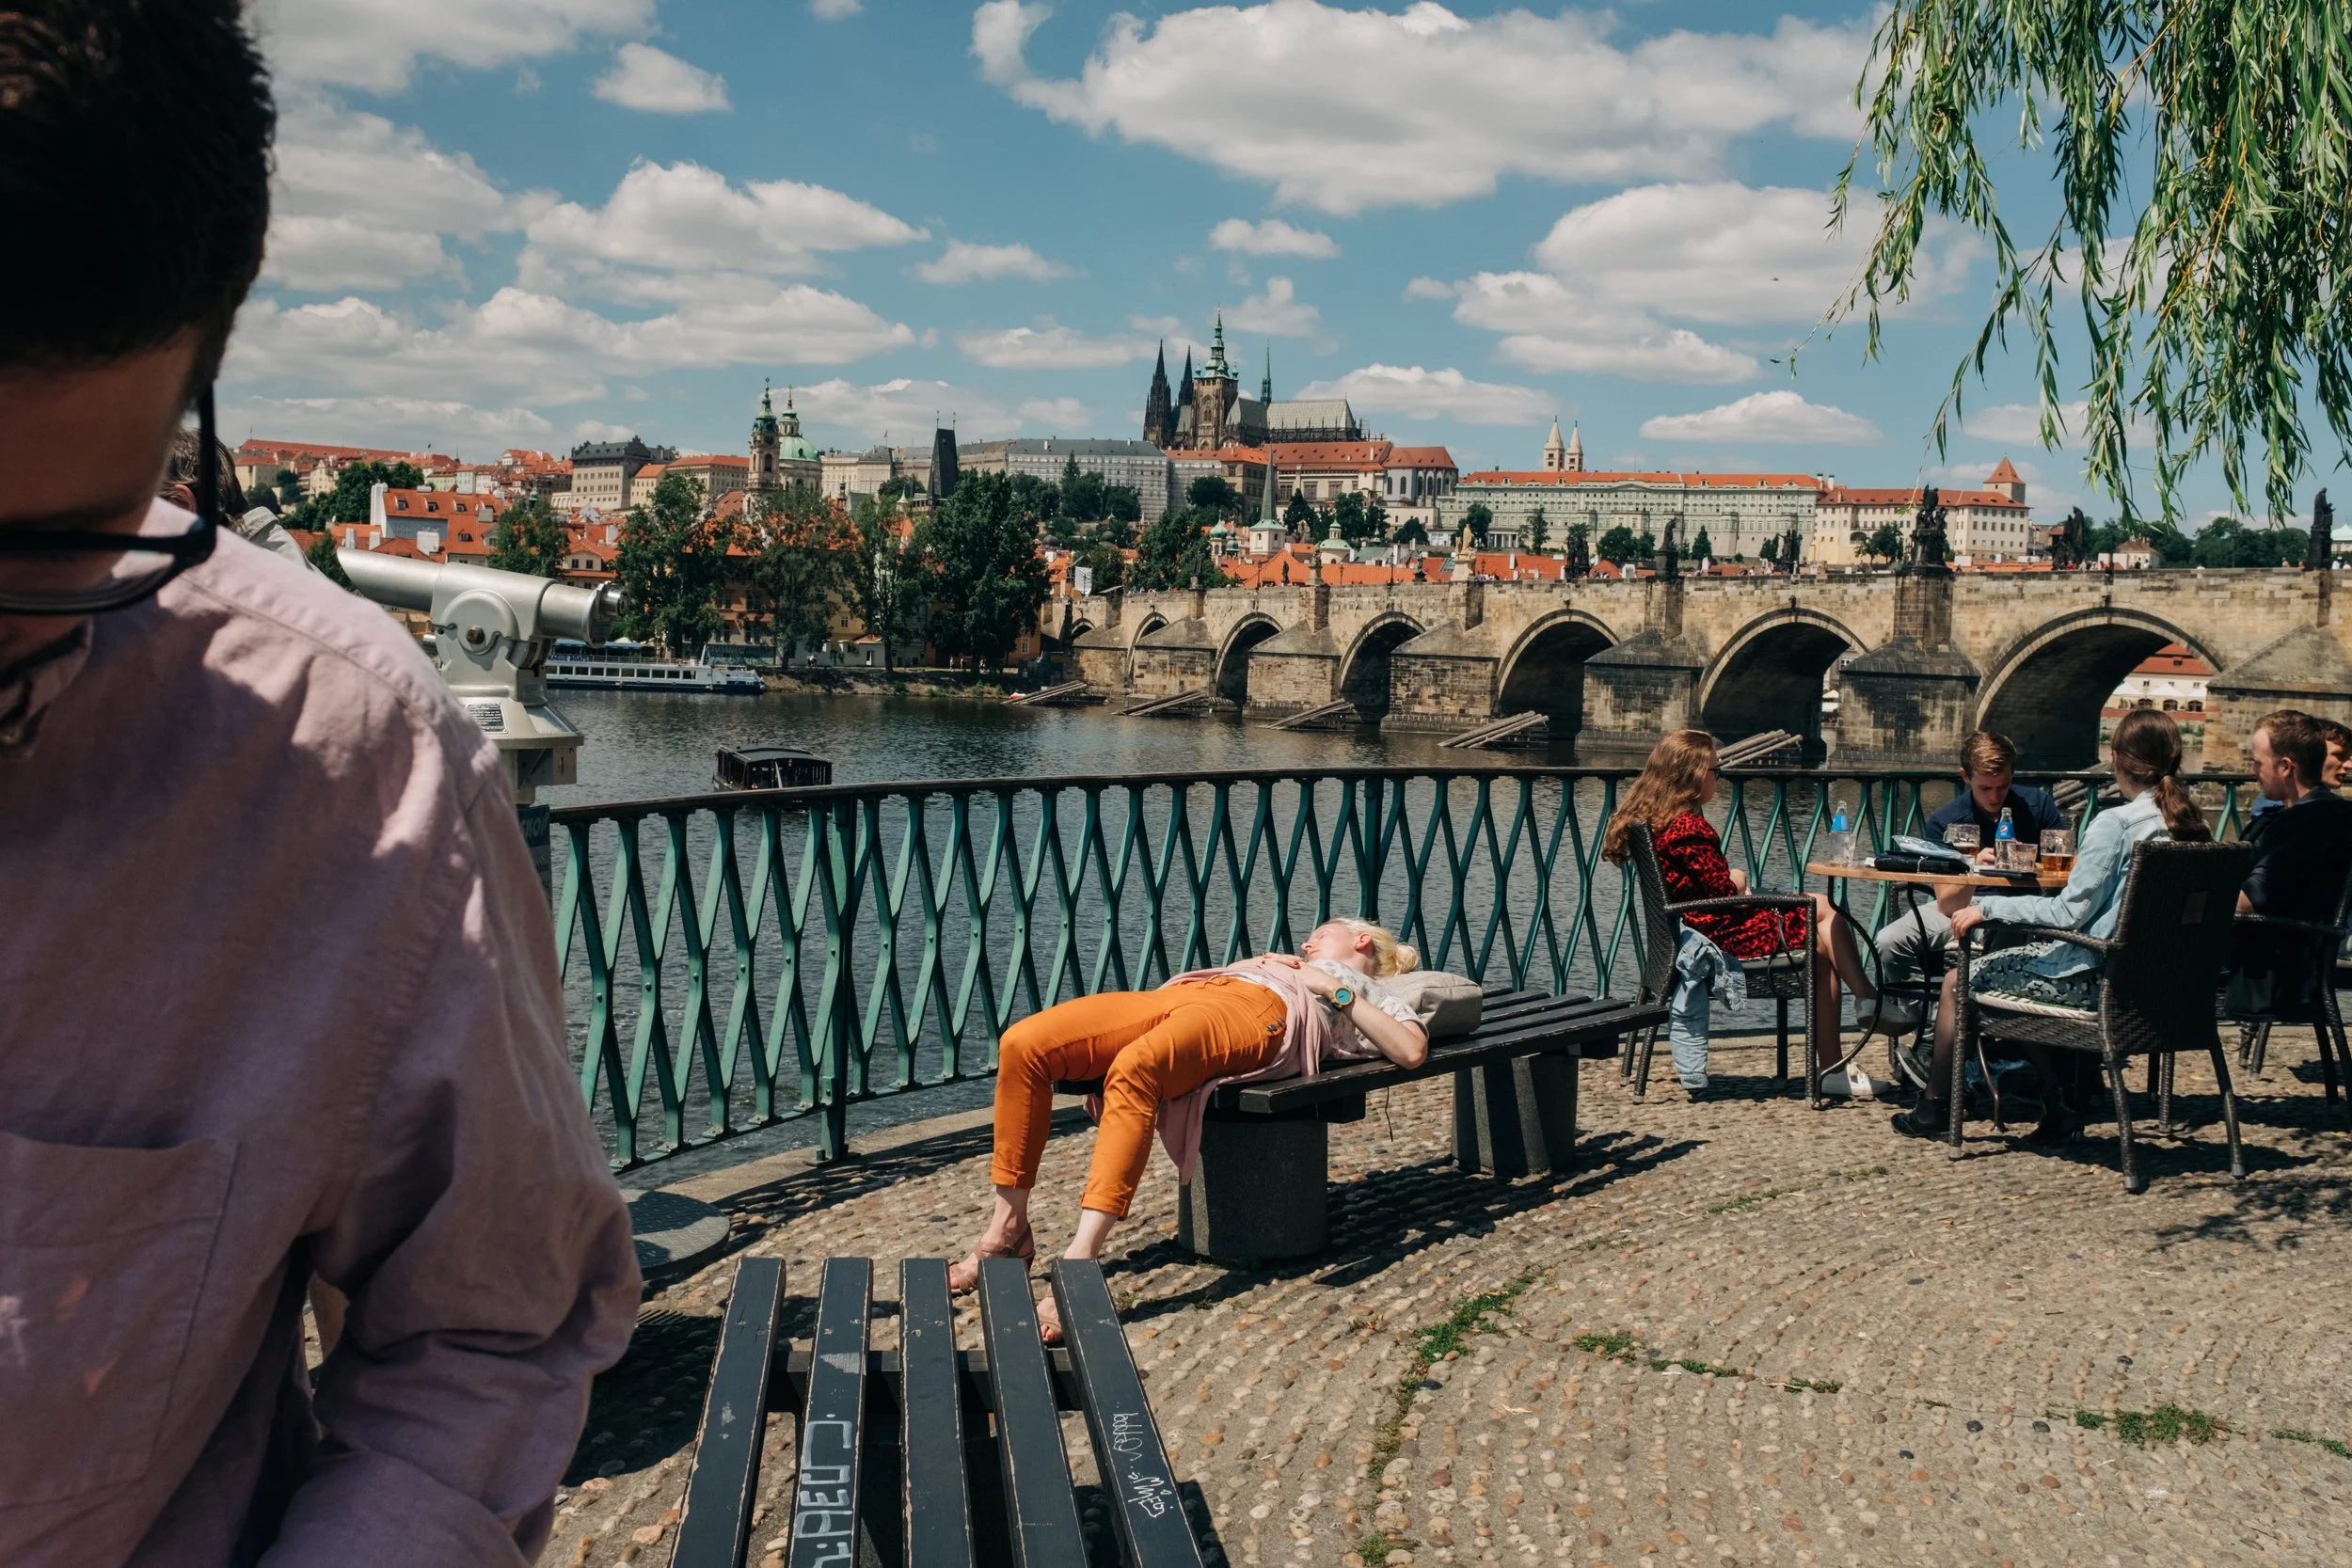
The hard, yet diffused light in this scene helps give a strong contrast with deep shadows that separates the subject from the background without the need for a shallow depth of field.
The diffusion keeps the reflective surfaces from becoming too distracting, and helps maintain a more even exposure across the highlights.
Modifiers may drastically change the quality of light hitting your subject, but an even greater difference can be made simply by repositioning your lights (or moving your subject in relation to a light). With a smaller light source, the difference of a few inches (or centimeters, for most of the world) can have a significant impact on the final result.
For outdoor photos, the difference of a few minutes can impact how the sun hits your subject. In general, though, changes in light are measured in broader movements, or in the subject's relation to the light. This leaves a lot of variation and overlap when discussing lighting position but helps give a standard nomenclature to use when planning or discussing your shots.
This is the broadest term, but also one of the most useful. It originates in the film industry where exact lighting descriptions are impractical due to the actor's movement through a scene. The fact that it covers a broad variety of lighting is what makes it useful though and can often be used to tie fairly unrelated shots together in a fairly consistent manner.
The premise of near or far lighting relies on the subject’s position in relation to both the camera and the key light. In portraiture, for example, imagine looking top-down on the model and draw a line running through their head in the direction they’re looking. If the camera and light are on the same side of the line, that’s near lighting. If the camera and light are on opposite sides of the imaginary line, it’s far lighting.
While this seems too simplistic to have much impact, simply having the subject turn their head can completely change the look. And if building a series of photos, getting that consistent look of near or far lighting can tie together photos from different sessions taken on different days, while using different lighting setups.
When discussing landscape or street photography, the dividing line can sometimes be harder to define but is equally important in creating a consistent body of work. The dividing line may be the face of a building, a terrain feature, or any number of things within the scene that are intended to be a primary subject. This can also help to highlight a non-obvious subject within a scene by tying the lighting on that particular subject to the rest of a set, while the more obvious subject may have a different light.
Lighting descriptions can sound complicated and full of technical jargon, but if you break it down into individual pieces it becomes much more manageable. Let’s look at an image as an example.
While you may not always be able to control the lighting, you can control where you are in relation to the light to achieve the same effect.
Let’s expand on our lighting lesson from earlier in the course and go deeper into the lighting itself: how to best utilize it, artistic representation, and lighting design.
And while there are lots of technical terms, artistic ambiguities, and subjective preferences, it all comes down to being intentional with your choices and understanding how to turn those choices into a finished photo.
Qualities of Light
We’ve previously discussed the differences in hard vs. soft and specular vs. diffuse, so let’s get into why we might want one over another. The quick and easy answer that gets thrown around is “use the softest light possible,” but in reality, that’s often not the best choice.
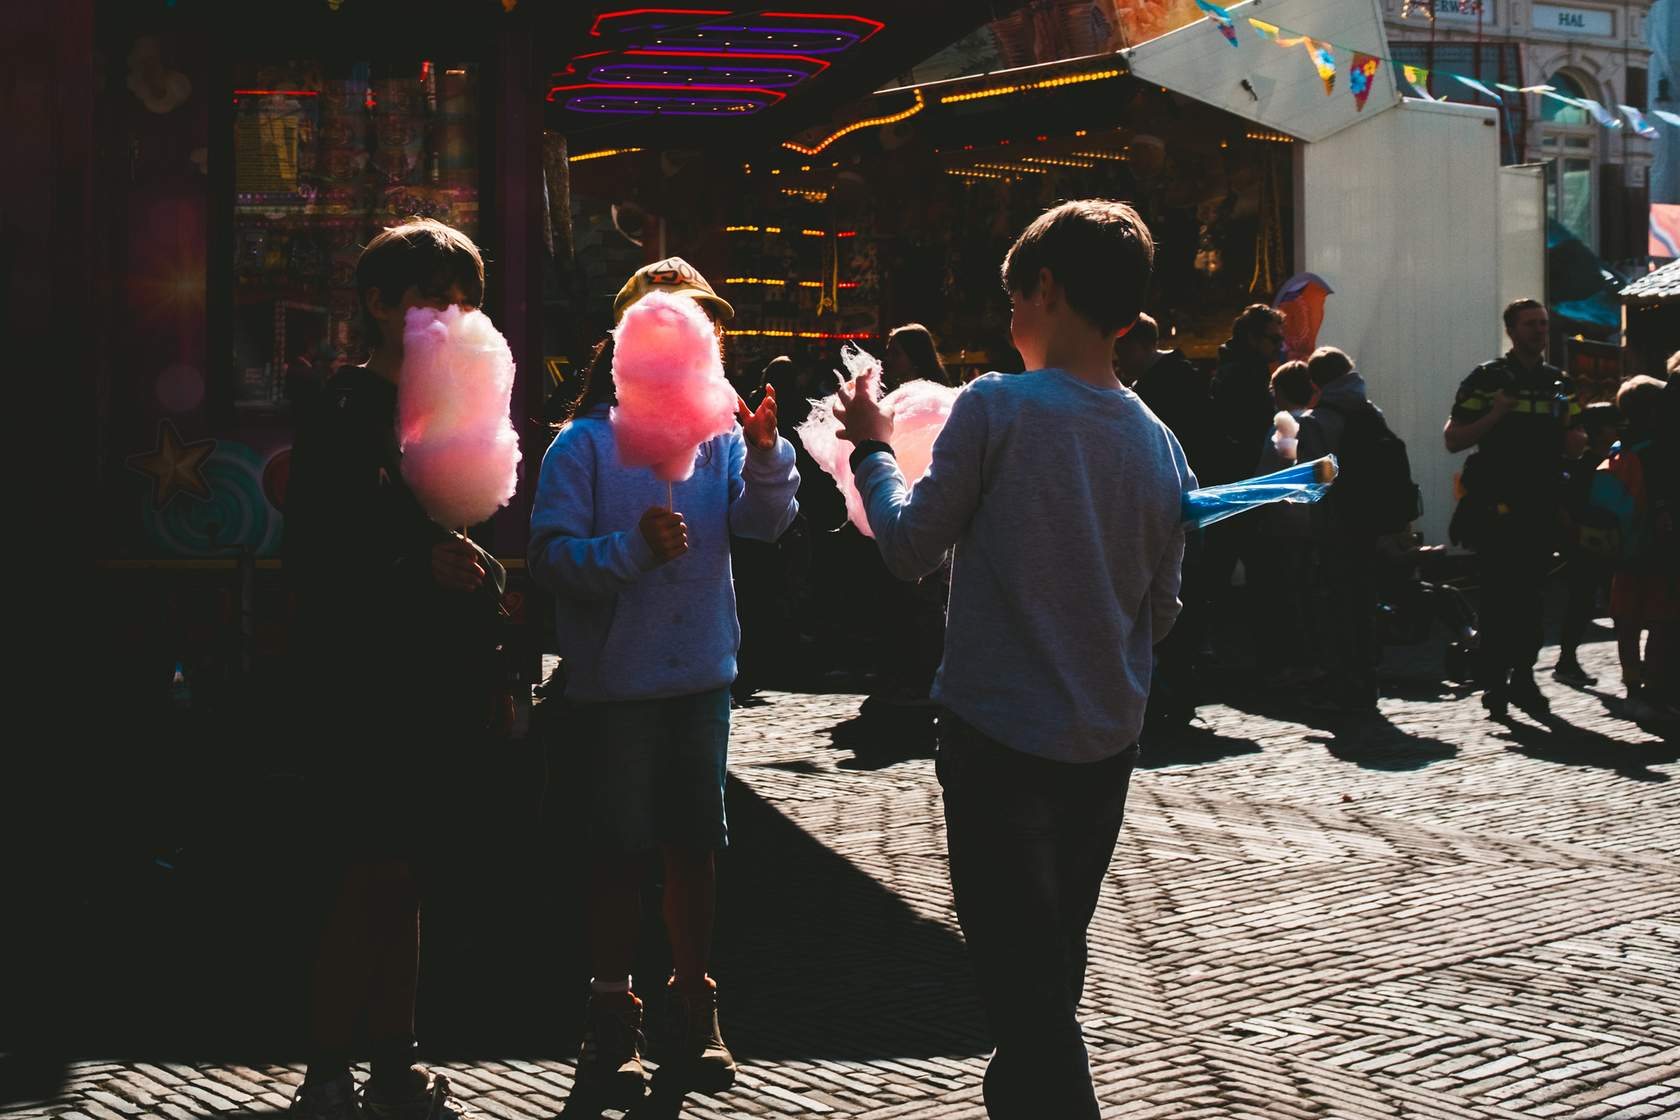
The hard, yet diffused light in this scene helps give a strong contrast with deep shadows that separates the subject from the background without the need for a shallow depth of field.
The diffusion keeps the reflective surfaces from becoming too distracting, and helps maintain a more even exposure across the highlights.
Click each '+' to learn more about the different types of lighting.
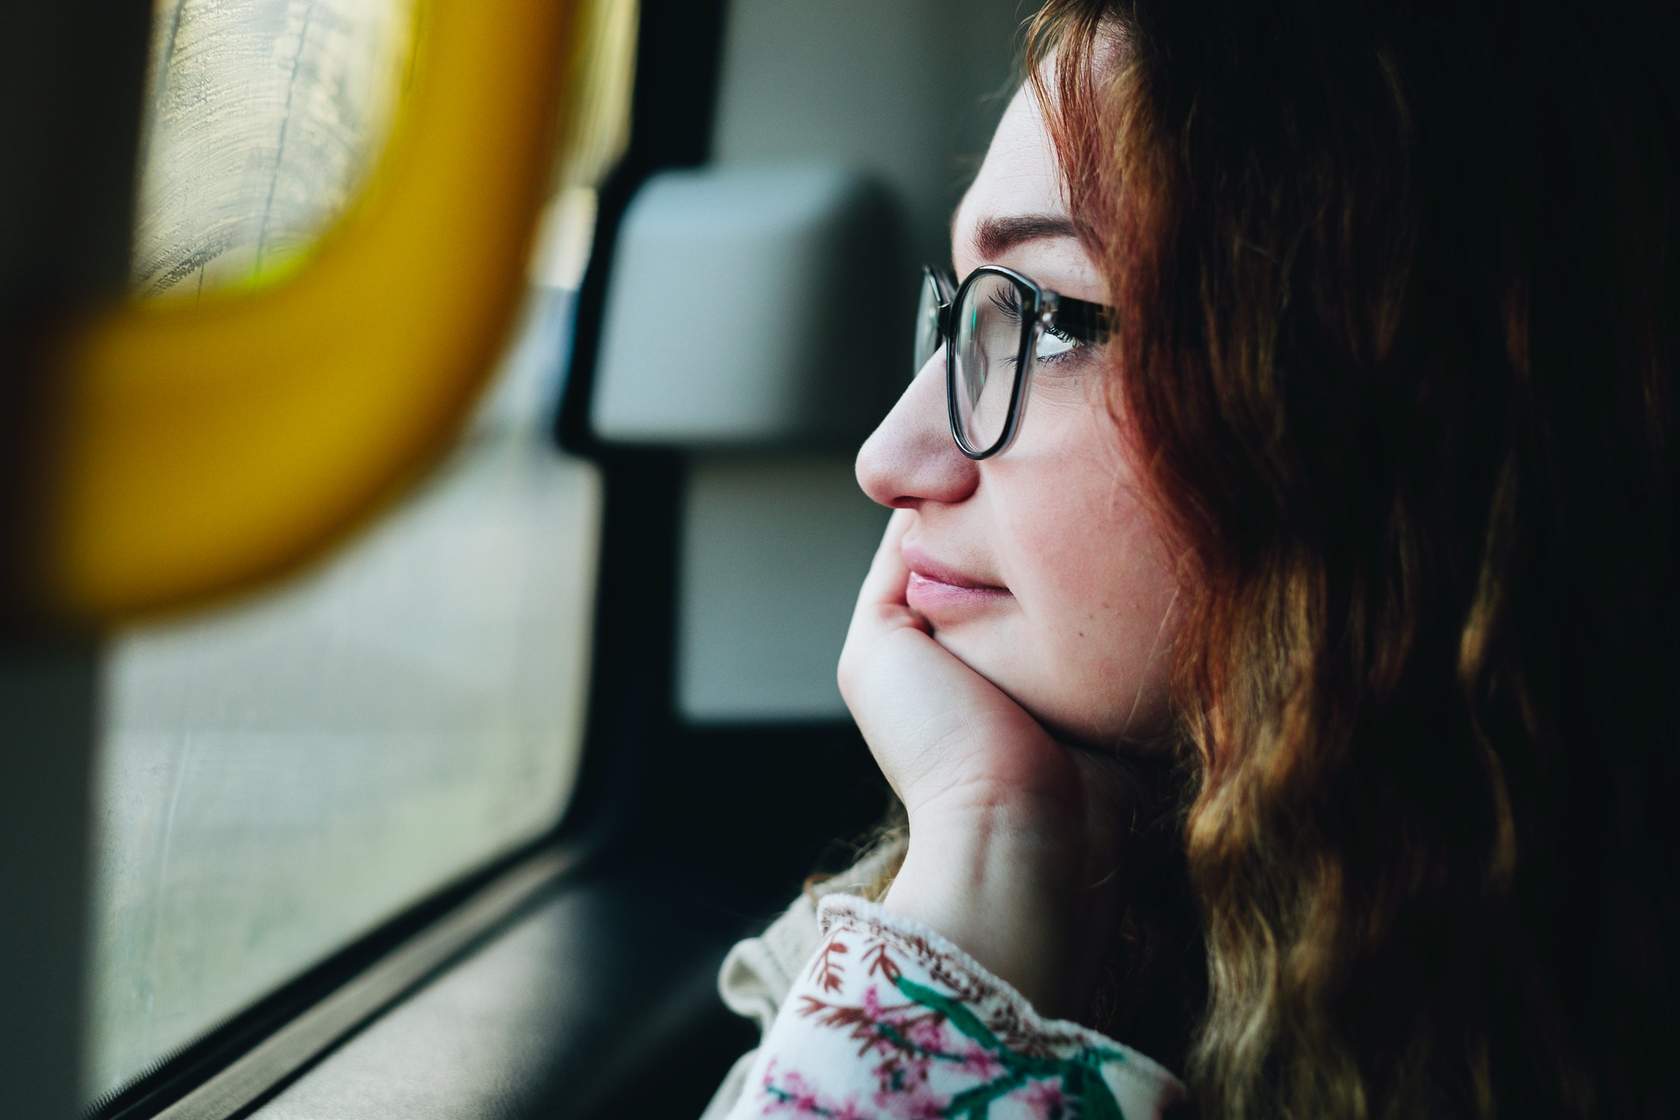
This lighting works great for simple portraits where you want the subject’s skin to look smooth and even, or in busy scenes where the subject may stand out through color, framing, or texture.
The light is even, with fewer shadows to worry about becoming a distraction. It’s fairly flattering for portraits, can work great for getting an even exposure on a landscape, but often lacks the more distinct shadows that can add dimension to a scene.
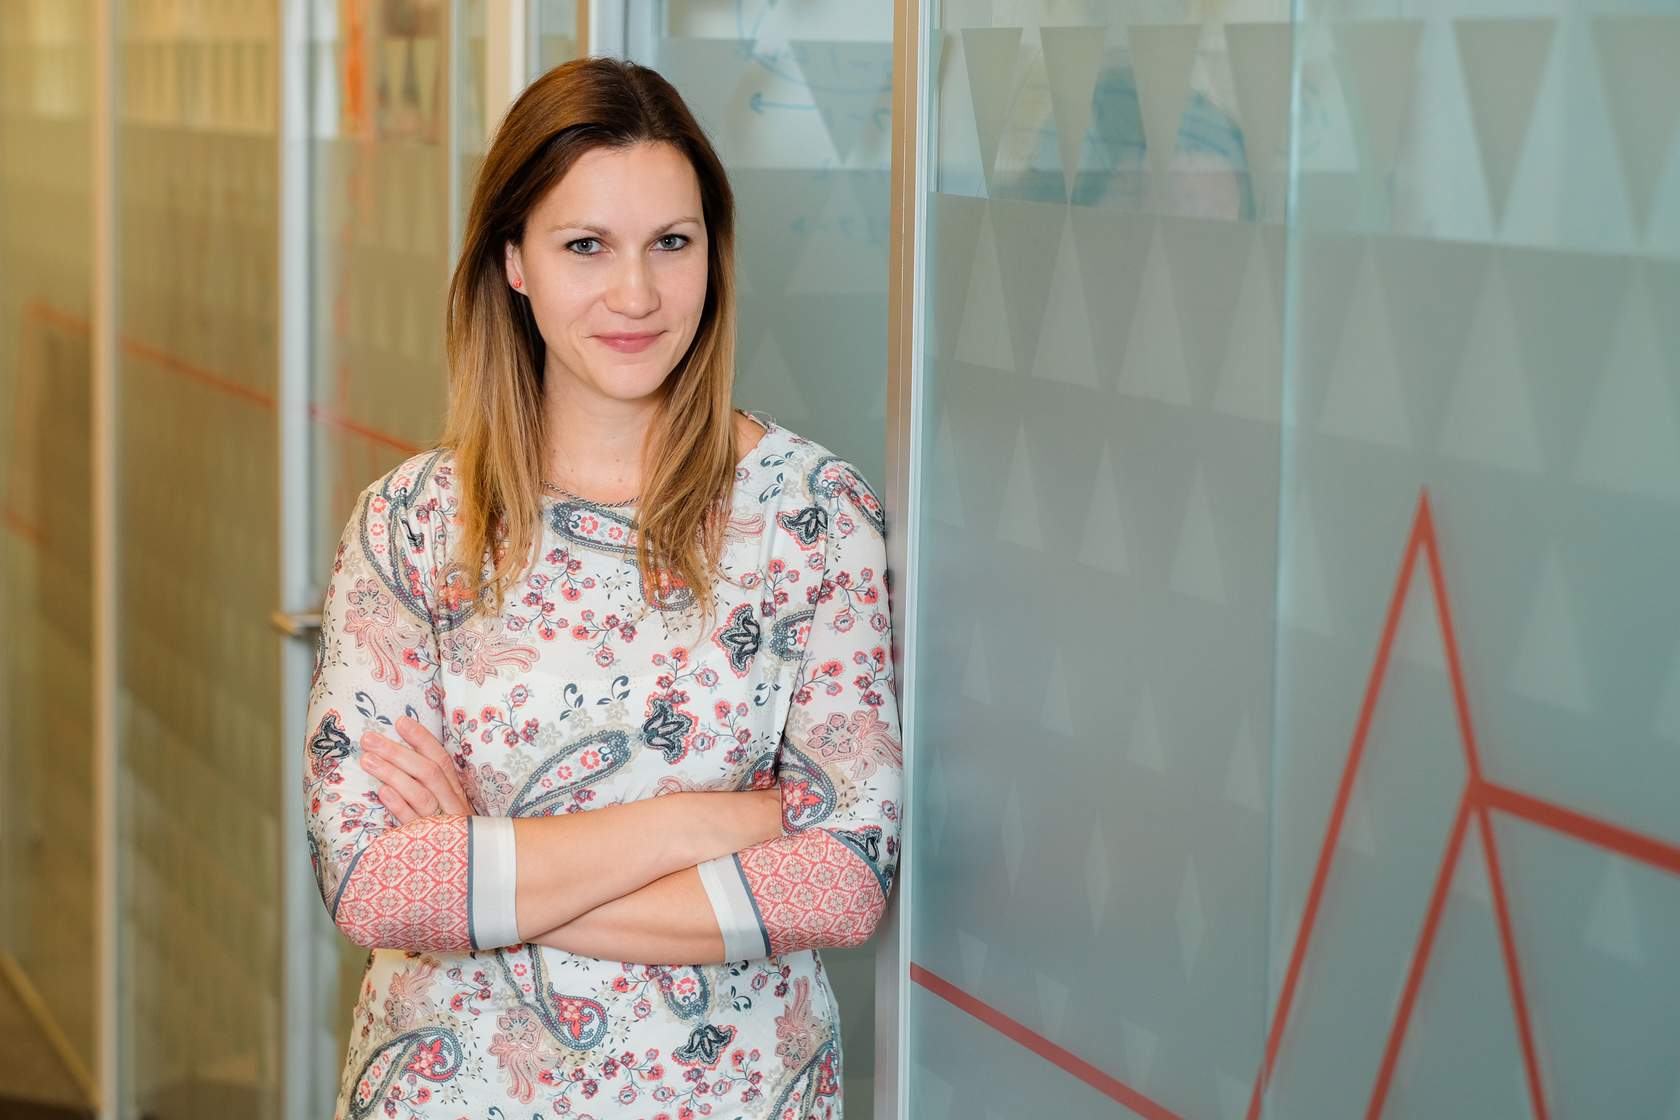
Image example:Notice how evenly the light falls across her entire face. There are no bright highlights competing for attention and no harsh shadows creating contrast. The overall exposure is smooth and consistent, which is exactly what soft, diffuse light produces.
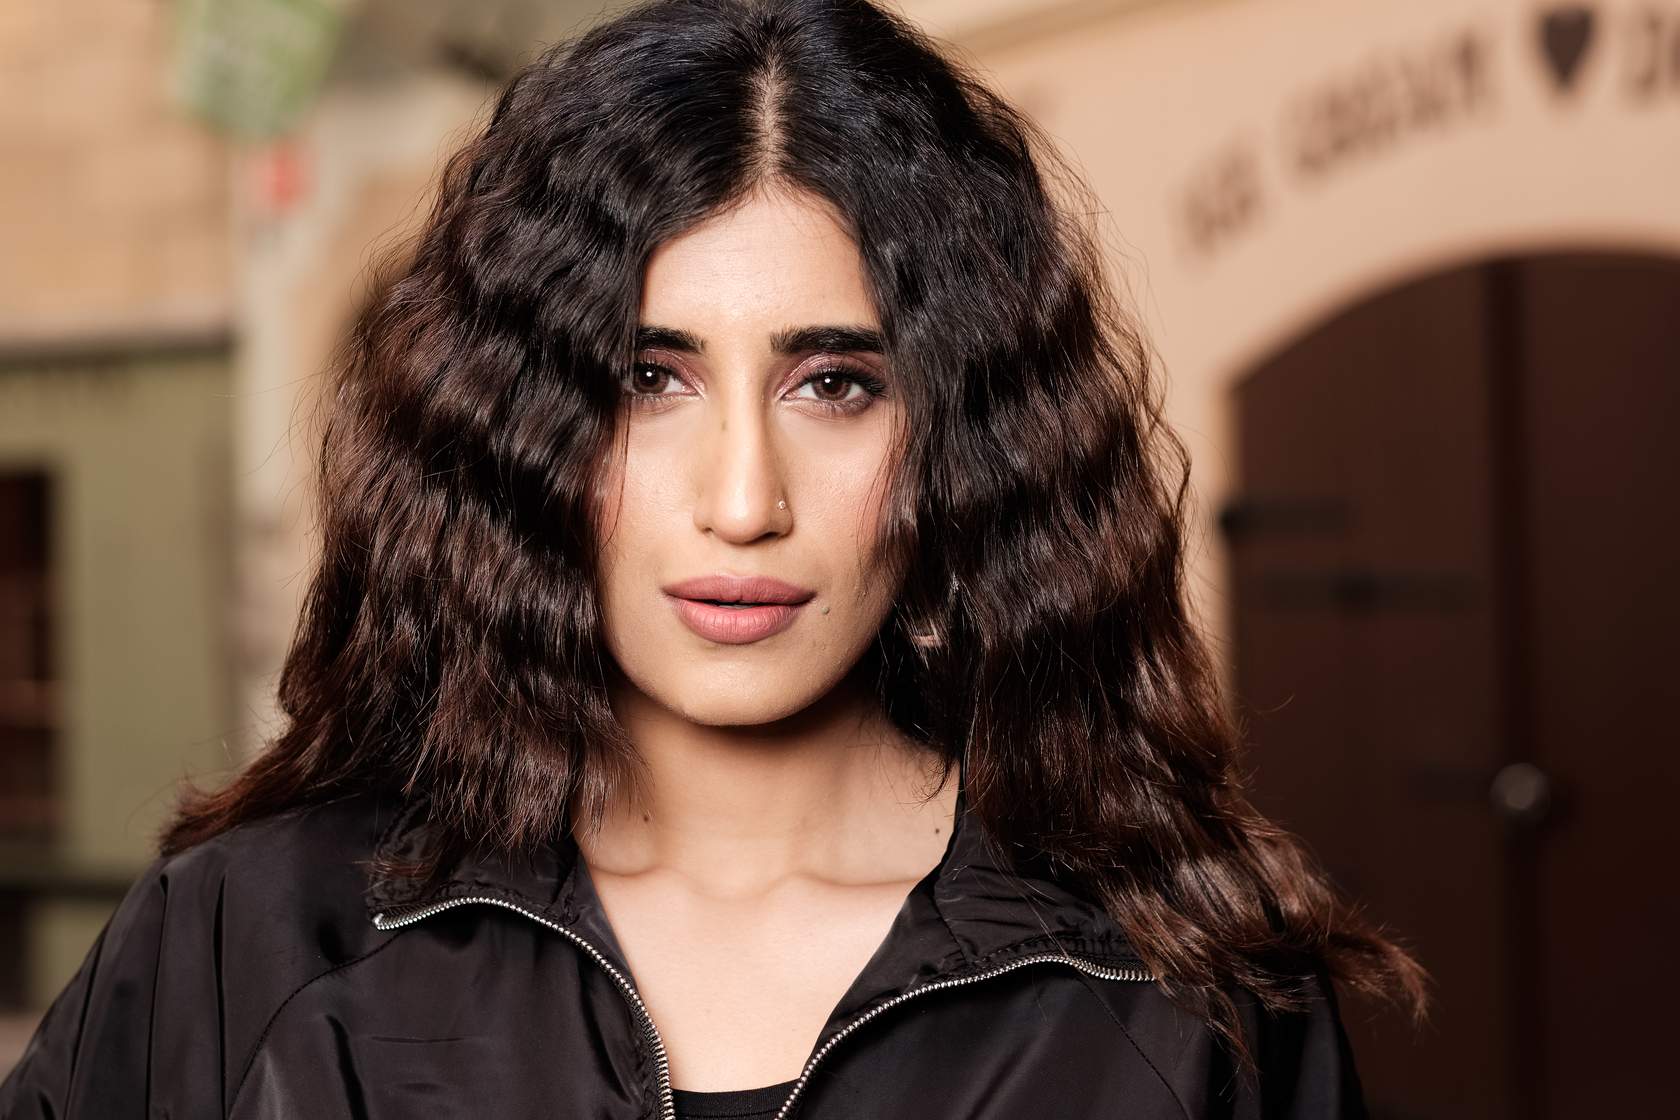
While the difference between a diffuse and specular light can be subtle at times, this style works well for portraits when you want a softer or more flattering light but still want a wider dynamic range.
It can be useful in a scene to create a more dynamic image while keeping everything brightly lit, or in adding further contrast to a low-key scene where you still want the model in a softer light.
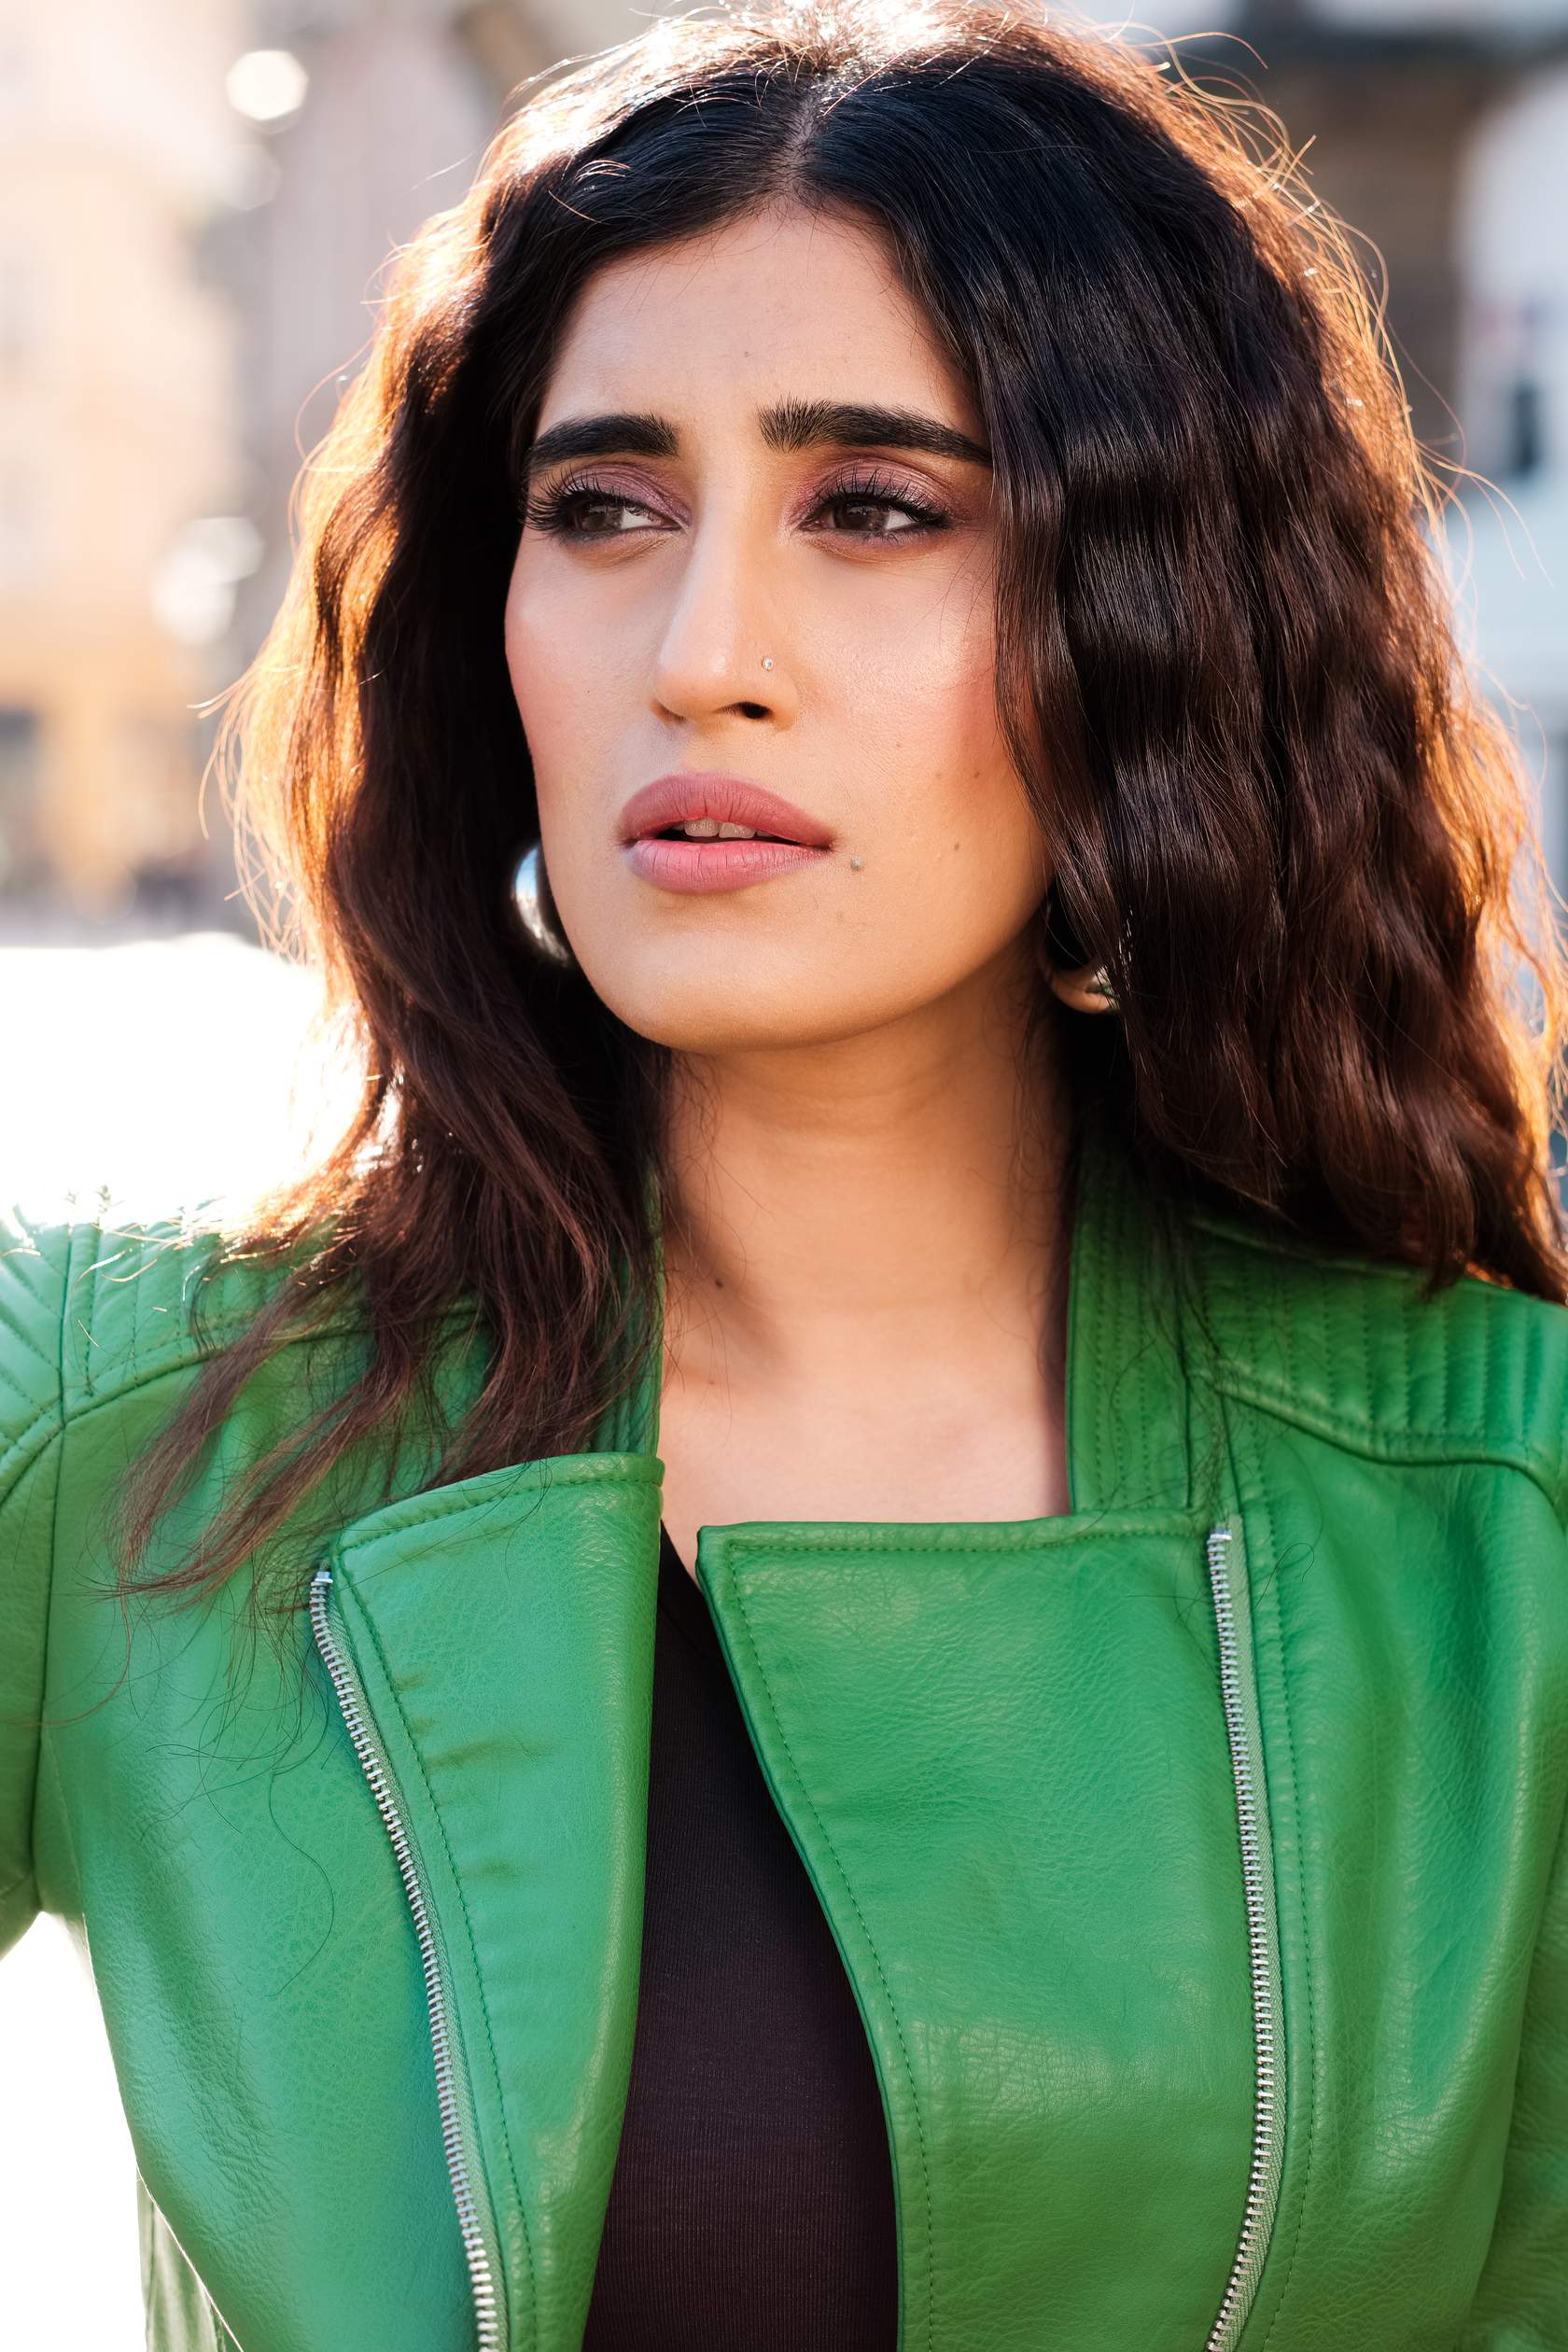
Image example: The light here is still relatively soft at the edges of her shadows, but look at how much more dynamic range there is across her skin. The highlights have a warmth and glow to them that the diffuse examples lack, giving the image more contrast while still feeling flattering.
While this is much the same as using the more specular light, diffusion over a hard light can smooth out the brightest highlights and let you get a slightly more evenly lit subject in an otherwise high-contrast scene.
This can also be slightly more flattering for models when using a hard light, although correct placement of lights (or positioning of the subject when using ambient light) will still have a greater effect on “flattering” light than the diffusion.
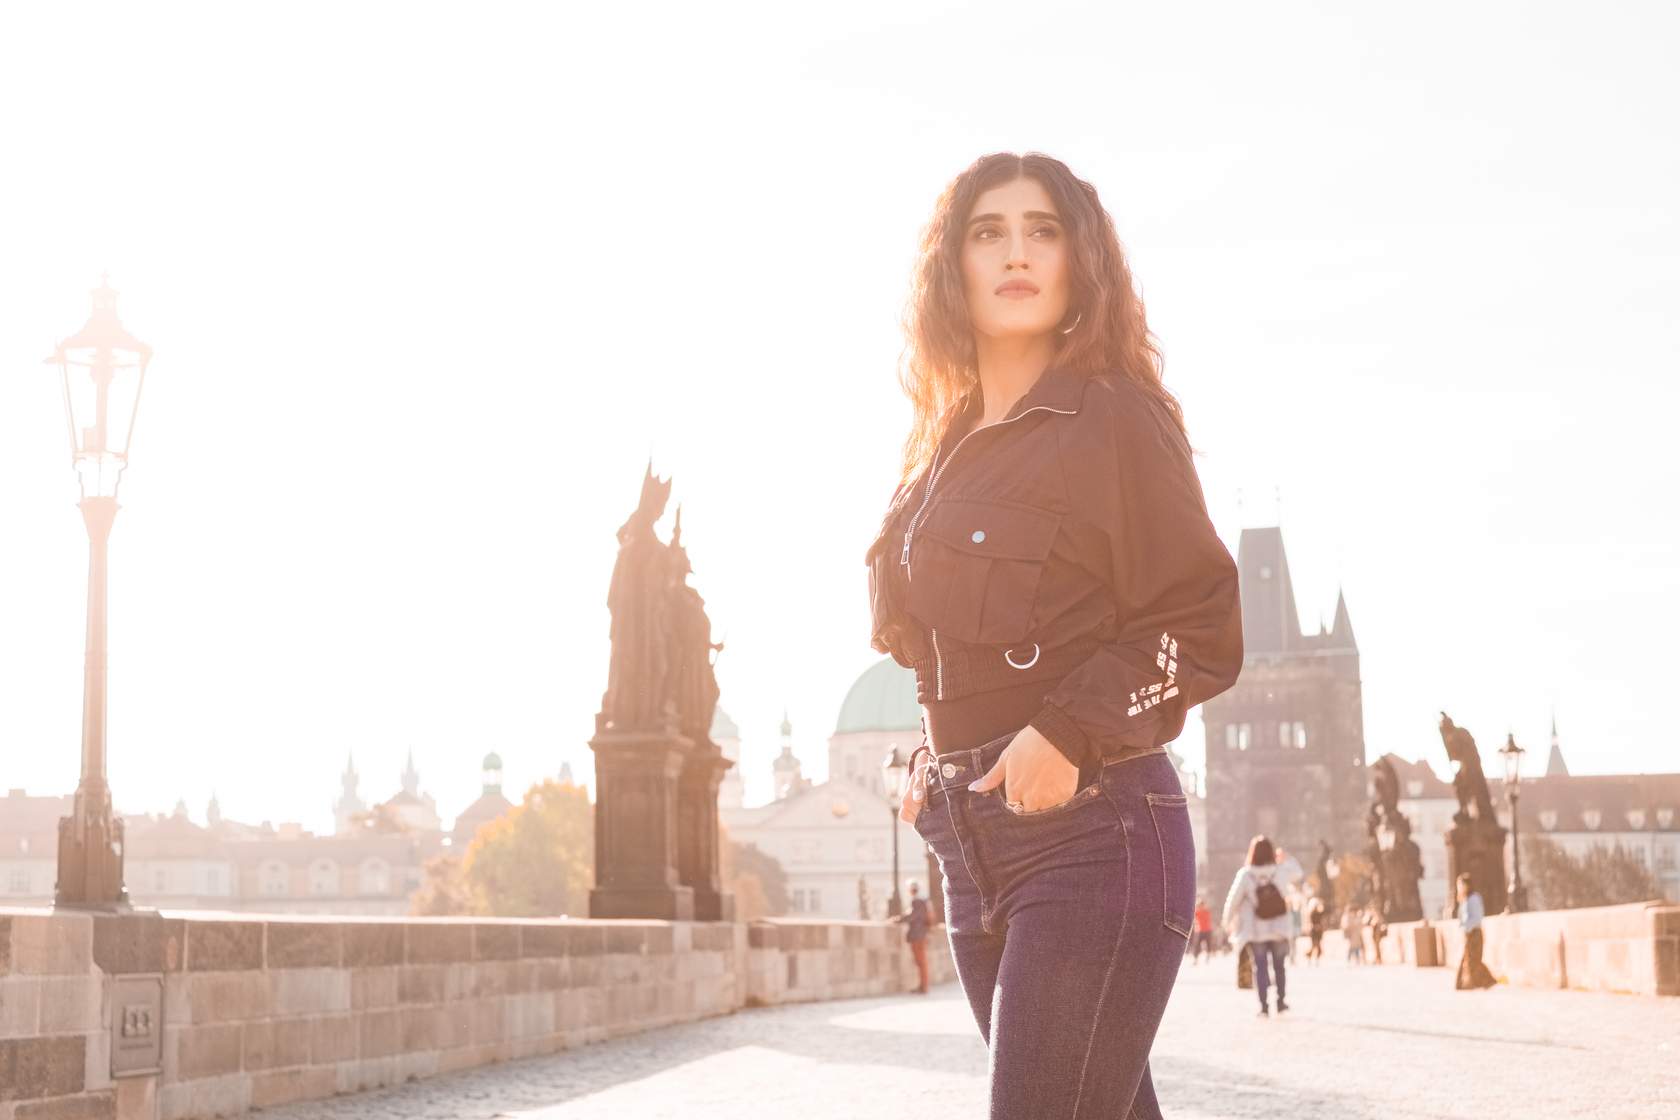
Image example: The light is clearly coming from a strong, directional source, giving the image high contrast and well-defined edges. But notice that the brightest highlights on her skin don't have the sharp, blinding quality you might expect. The hazy backlit sky is softening those hotspots even while keeping the overall contrast strong.
While this is generally considered unflattering for portraits, hard light can create dynamic contrast in landscape or street photography.
The high contrast between highlights and shadows can create a dynamic scene based on lighting over color or can be used to make certain colors stand out.
The hard lines of shadow can also be used as a compositional element that interacts with the scene.
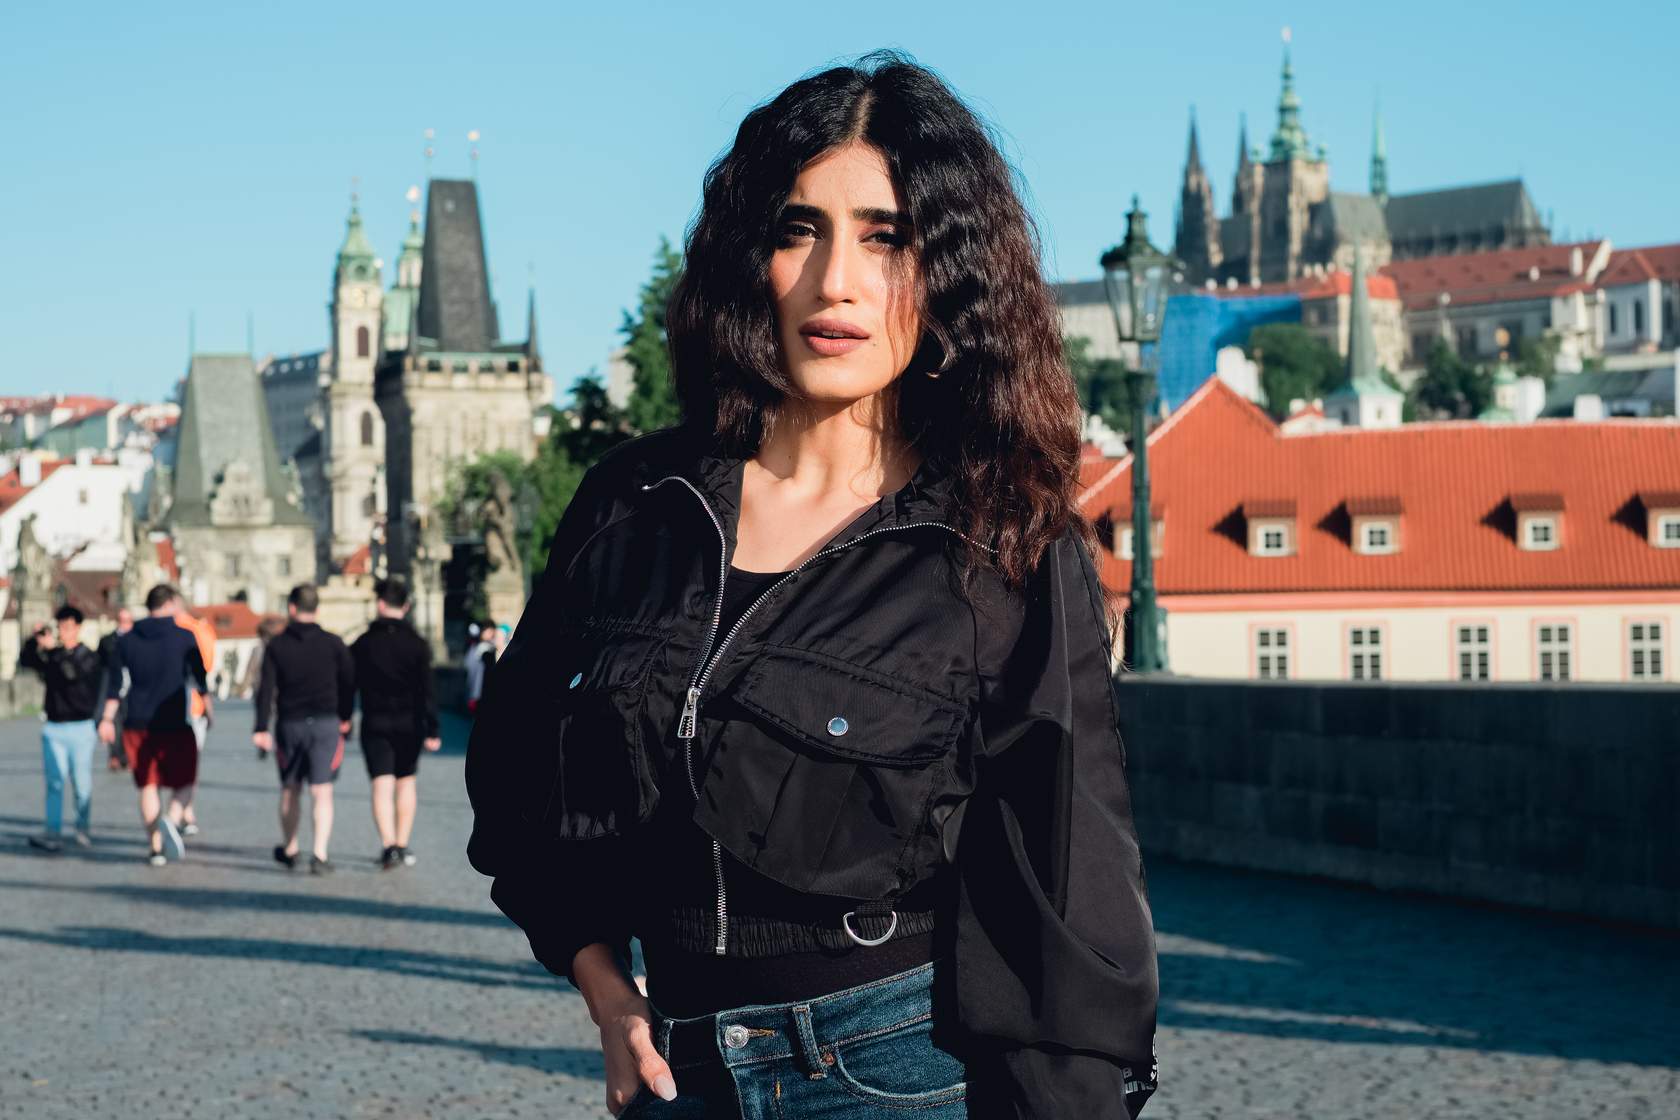
Image example: Look at how sharply defined the shadows are, and how bright the highlights are on her skin and hair. The clear blue sky overhead means there is nothing to diffuse or soften the light at all, giving you the full range from deep shadow to bright highlight.
Positioning Lights
Modifiers may drastically change the quality of light hitting your subject, but an even greater difference can be made simply by repositioning your lights (or moving your subject in relation to a light). With a smaller light source, the difference of a few inches (or centimeters, for most of the world) can have a significant impact on the final result.
For outdoor photos, the difference of a few minutes can impact how the sun hits your subject. In general, though, changes in light are measured in broader movements, or in the subject's relation to the light. This leaves a lot of variation and overlap when discussing lighting position but helps give a standard nomenclature to use when planning or discussing your shots.
Near vs. Far
This is the broadest term, but also one of the most useful. It originates in the film industry where exact lighting descriptions are impractical due to the actor's movement through a scene. The fact that it covers a broad variety of lighting is what makes it useful though and can often be used to tie fairly unrelated shots together in a fairly consistent manner.
The premise of near or far lighting relies on the subject’s position in relation to both the camera and the key light. In portraiture, for example, imagine looking top-down on the model and draw a line running through their head in the direction they’re looking. If the camera and light are on the same side of the line, that’s near lighting. If the camera and light are on opposite sides of the imaginary line, it’s far lighting.
While this seems too simplistic to have much impact, simply having the subject turn their head can completely change the look. And if building a series of photos, getting that consistent look of near or far lighting can tie together photos from different sessions taken on different days, while using different lighting setups.
When discussing landscape or street photography, the dividing line can sometimes be harder to define but is equally important in creating a consistent body of work. The dividing line may be the face of a building, a terrain feature, or any number of things within the scene that are intended to be a primary subject. This can also help to highlight a non-obvious subject within a scene by tying the lighting on that particular subject to the rest of a set, while the more obvious subject may have a different light.
Drag the camera around the subject.
The light stays fixed. Watch the lit and shadow sides shift as you cross the dividing line.
Top-down view
Photo example
Move the camera to read the setup.
More Modifiers
Feathering
To “feather” a light simply means to turn the light. The source stays at the same point, but the angle is changed in relation to the subject.
This can be used to get a more dynamic shot with a softer light source, as it’s essentially shrinking the source in one direction. The downside is that less of the light’s power is aimed at the subject, so that will need to be factored into the exposure, especially when balancing with background or ambient light.
Drag the magenta handle to rotate the light
Top-down view
How it looks

Rotate the light source to see how feathering changes the quality of light on the subject.
Flagging
While we’ve discussed what flags are, using them can sometimes be difficult as it’s an extra piece of gear to coordinate. In general, when placing the flag between the light and subject you have more control and more coverage the closer the flag is to the light.
You can also move it farther from the light though and get a more precise coverage of a smaller area. It’s generally pretty simple to pick up on as you experiment, but you can also feather the flag to get even more precise control or place the flag between the light and camera to prevent flaring in the lens (similar to using a lens hood).
Drag the flag to reposition it
Top-down view
How it looks

Drag the flag between the light and the subject to see how it controls what the light hits.
Diffusing
There is more to a diffuser’s application than just knowing what it does. It can soften the light on a subject, but if the subject is lit separately it can also be used to soften the light on the background to add another form of separation between background and subject.
And as any diffusion material will also reduce the brightness of the original source, diffusion can be used as a partial flag to dim light on the background without blocking it completely.
Drag the diffusion panel left or right
Top-down view
How it looks

Slide the diffusion panel to see how it changes the quality of light on the subject.
Adding them All Together
Lighting descriptions can sound complicated and full of technical jargon, but if you break it down into individual pieces it becomes much more manageable. Let’s look at an image as an example.
Click each '+' to learn more.
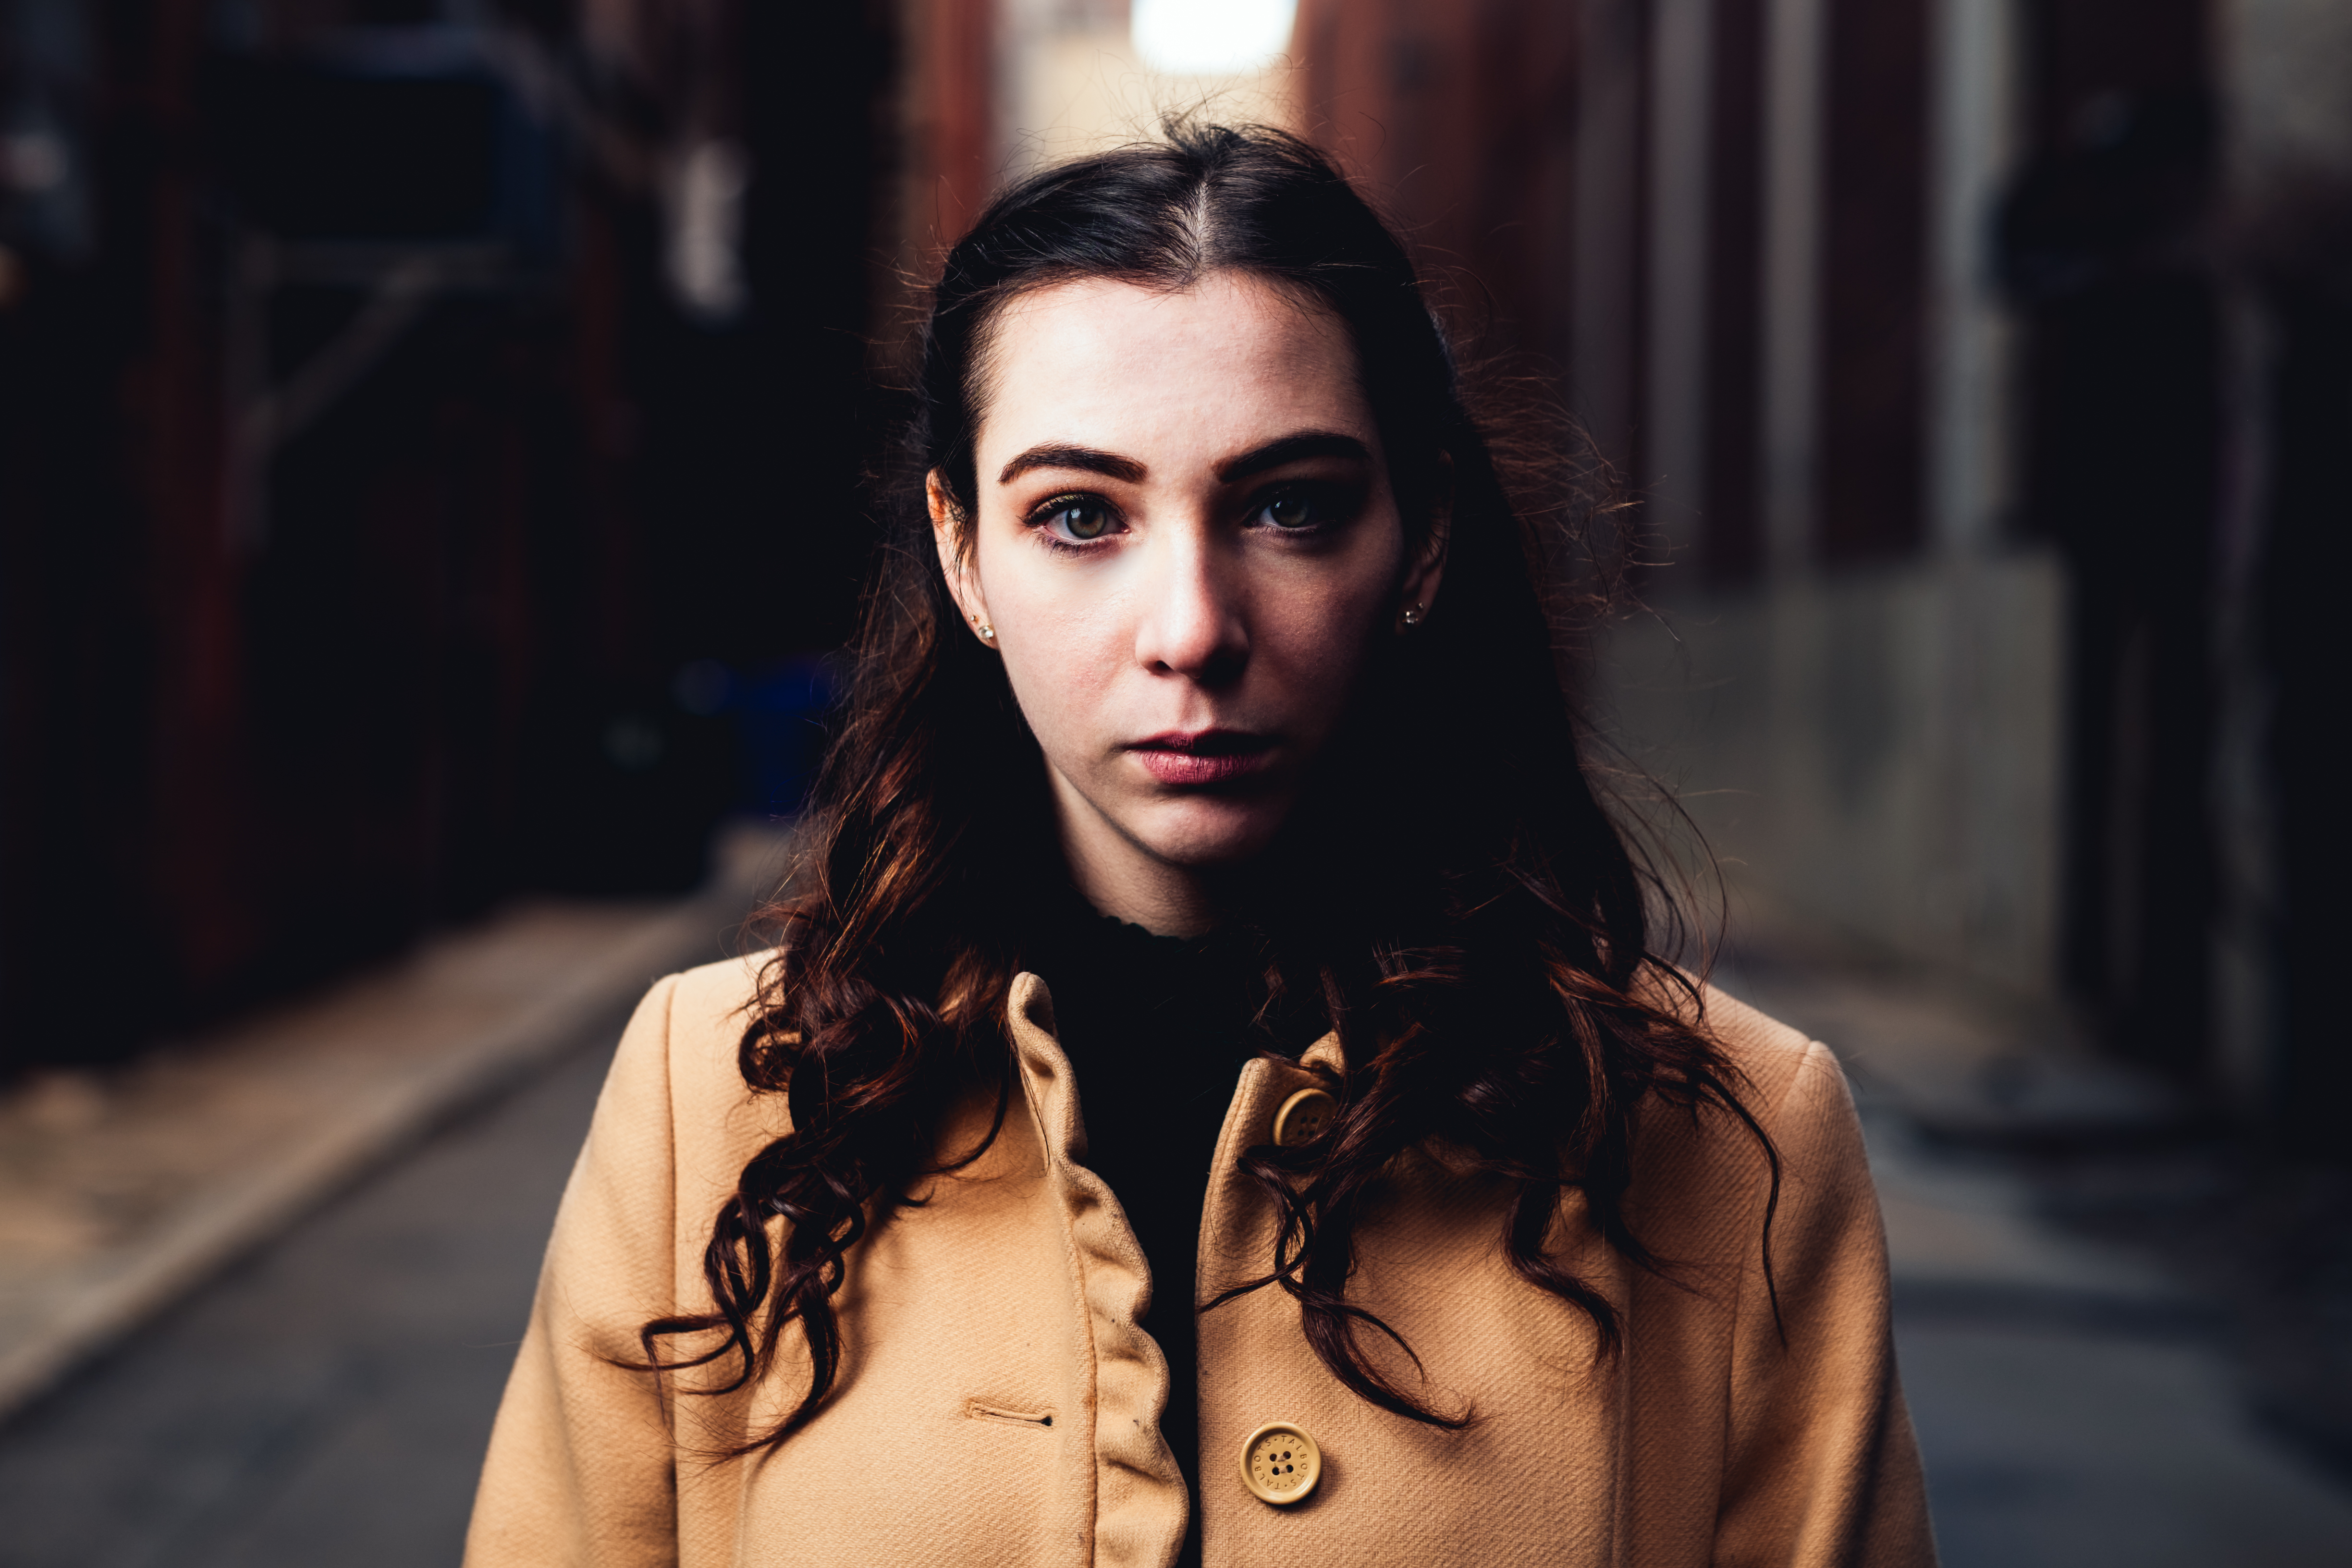
Hard or soft light?
The crisp, defined shadow under her nose and along her jaw tells us this is a hard light source.
A soft source would wrap around the face and produce a gradual, feathered transition instead of this clean edge.
Where is the key light?
The brightest point on her skin sits on the left side of her face relative to the camera.
The light is positioned at roughly 45 degrees to her left and slightly above eye level, a classic key light placement.
Separation from the background
The subtle brightening along the right side of her hair and shoulder isn't the key light. It's either a second source placed behind her or ambient light from the background.
It creates separation between her dark hair and the dark background without needing to brighten the background itself.
Controlling the background
The background is noticeably darker than the subject despite being in the same scene.
This is intentional exposure control, either by keeping the light focused tightly on the subject, by the subject being closer to the light than the background, or both.
The result keeps the viewer's eye from wandering.
How many sources?
The catch lights are your fastest clue to the number and shape of light sources. A single small, round catch light suggests a bare bulb or small source.
A rectangular catch light would indicate a softbox.
Two catch lights means two sources, or one source with a reflector for fill.
Artistic Use
Once you understand the basics of exposure and lighting, it’s fairly simple to get a well-lit photo.
There’s more to a photo than just having the shot well lit however, and a large part of creative lighting is deciding what parts of the scene to light, and from what direction.
Do you want only the subject lit?
Do you need some of the scene illuminated as well, but want its exposure to be darker than the subject?
Do you prefer more of a silhouette? Does that silhouette have a well-lit background, or a single strong source?
For a set or series, how similar does the light need to be?
Will it look cohesive simply by choosing near or far lighting?
Do you want a single hard light in your shots to tie them together, or do you want an even more uniform look and need the same light placement?
Does hard vs. soft matter as much to you as that similar lighting placement?
Knowing what you want the end result to look like and where to place the lights or subject is an important step in planning a photo.
Deciding on the lighting can sometimes be as simple as using what’s practical and available, but utilizing the lights can be purely artistic.
Click each tab to read more.
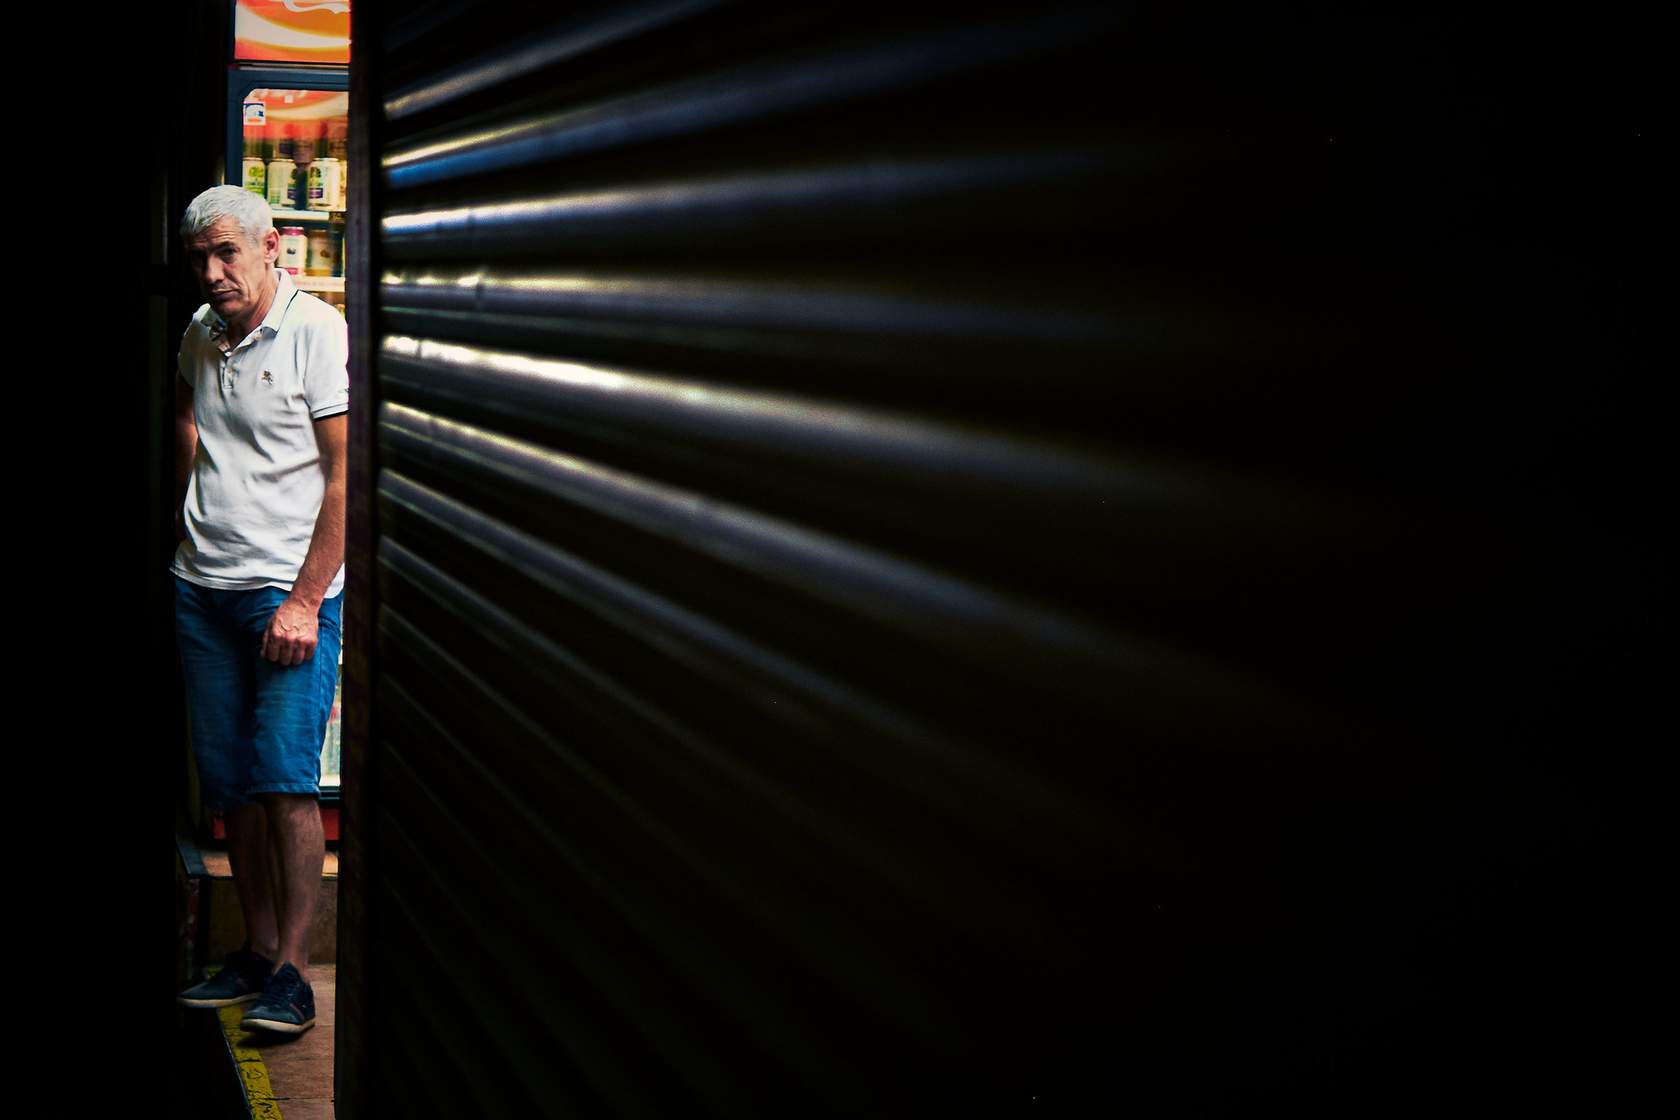
Scenes that are darker or more low-key tend to have a more imposing, ominous, or lonely, or more intimate feel to them.
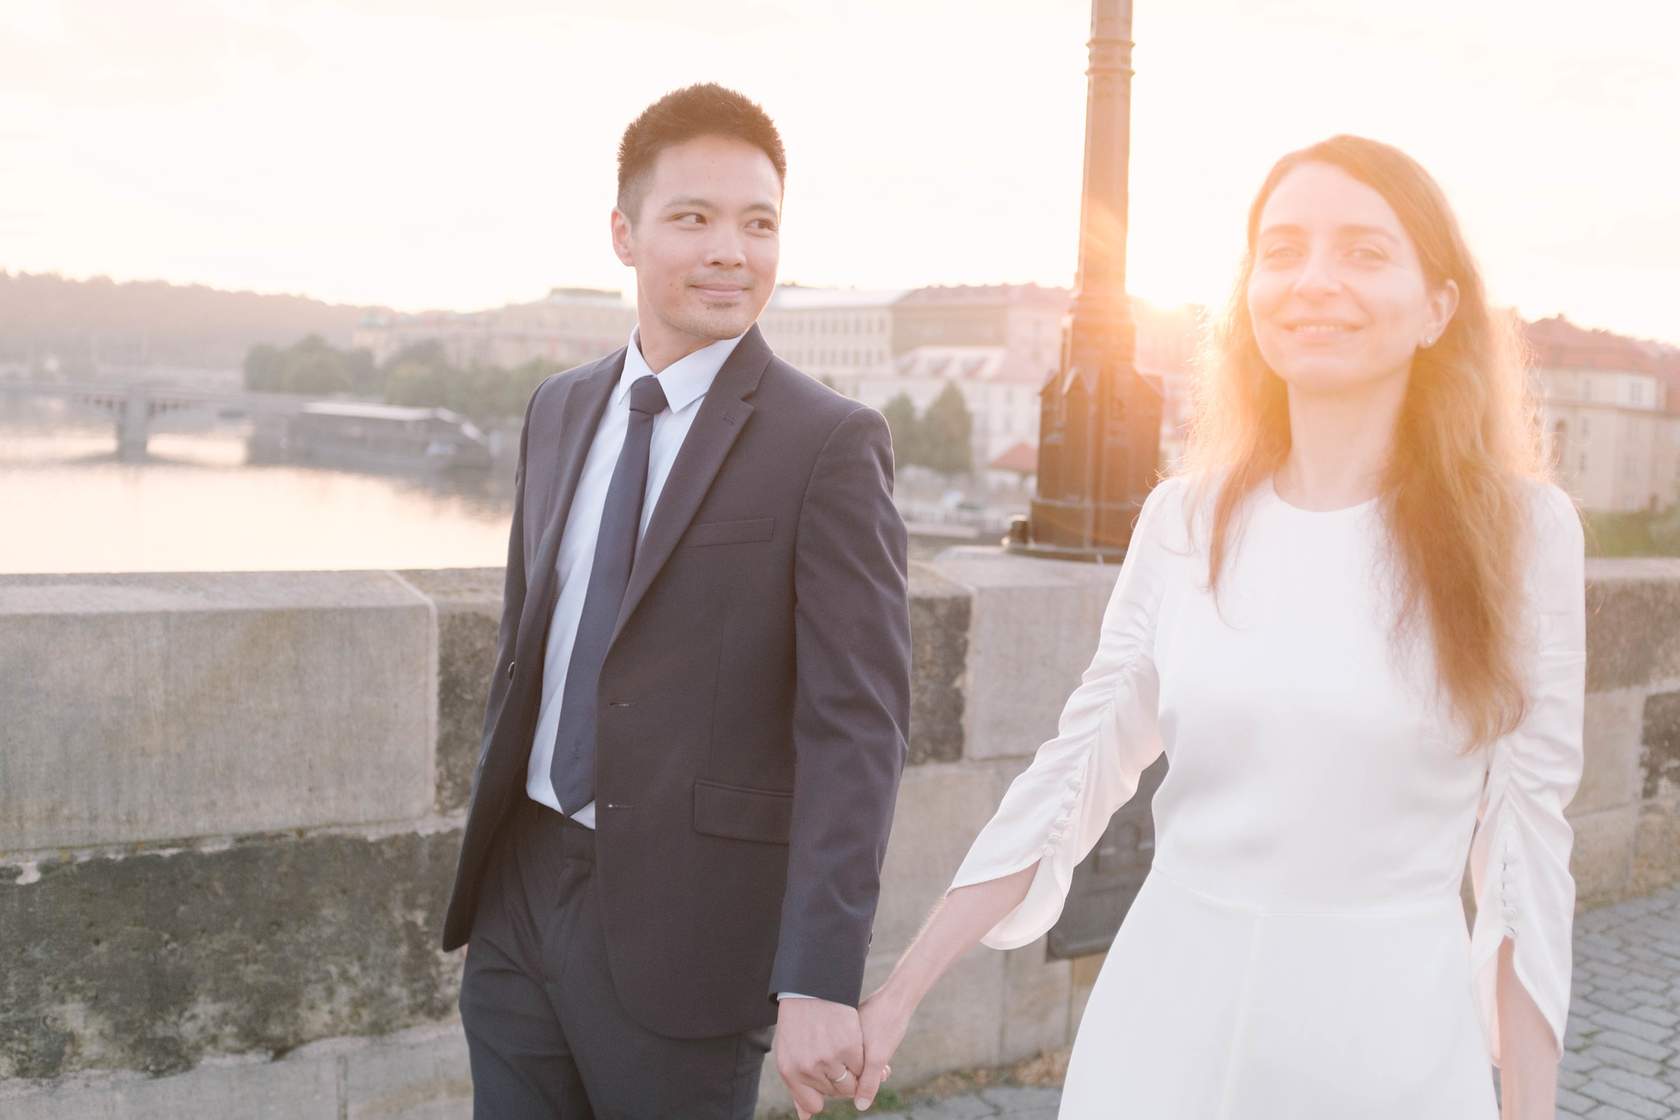
In contrast, brighter scenes tend to be more cheerful, carefree, or personal. The exact emotion evoked can vary quite a bit depending on the exact lighting but the different styles tend to fall in those categories.
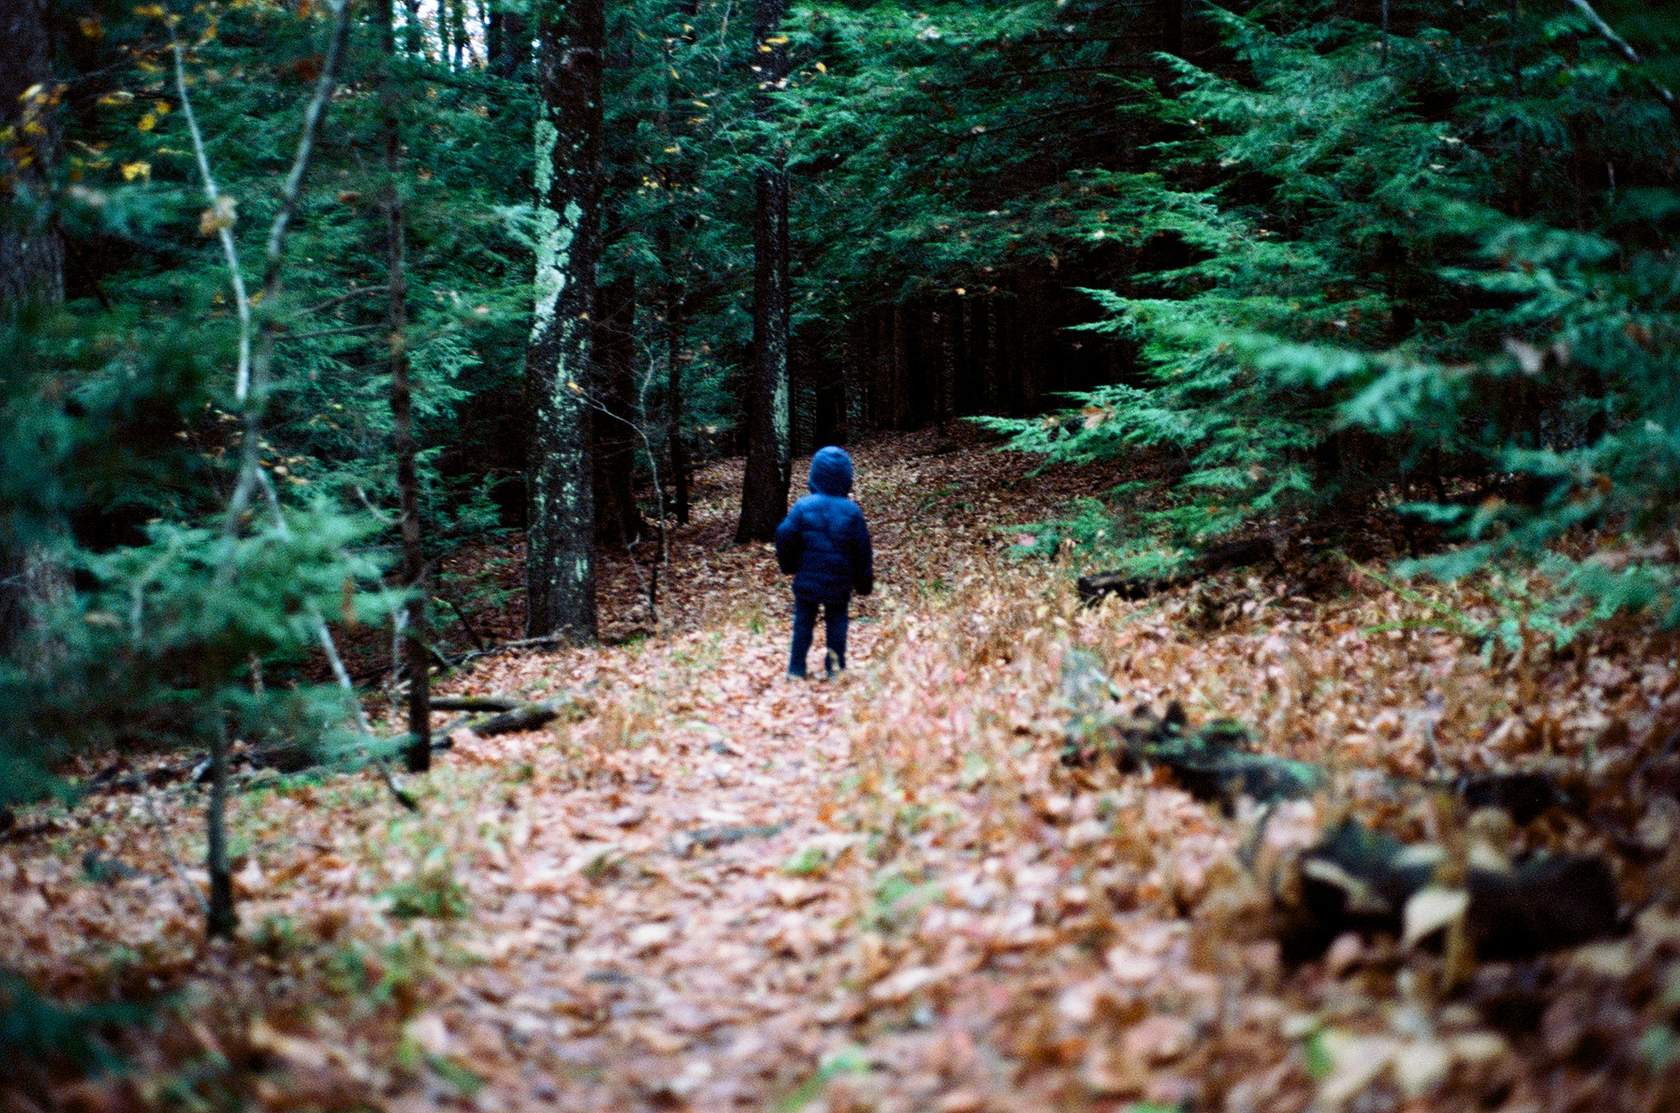
You can use that emotional response either to strengthen the response from your audience by using a lighting scheme that works with your composition, or to add a dissonance by working opposite to your composition and coloration.
A well-lit, evenly exposed shot that has harmonious but faded colors, and features a smaller subject centered with lots of negative space, can use the brighter emotions of the lighting and colors.
This can be used alongside the more “lonely” emotions from the negative space and muted tones. This combination can create a contrast in emotional response. That contrast can be stronger than a single emotion because of its conflicting nature.
In the same vein, a low-key close-up with bright colors can cause conflicting responses that build on each other and add to the effect.
On the other hand, conflicting responses can also simply make the shot look unintentional. It’s definitely worth experimenting but focus more on what you feel from the result than any chart or list of what styles give what emotions. Knowing the general response is a good starting point, but don’t be afraid to deviate from the general consensus if your lighting isn’t giving you the emotional response you want out of your shot.
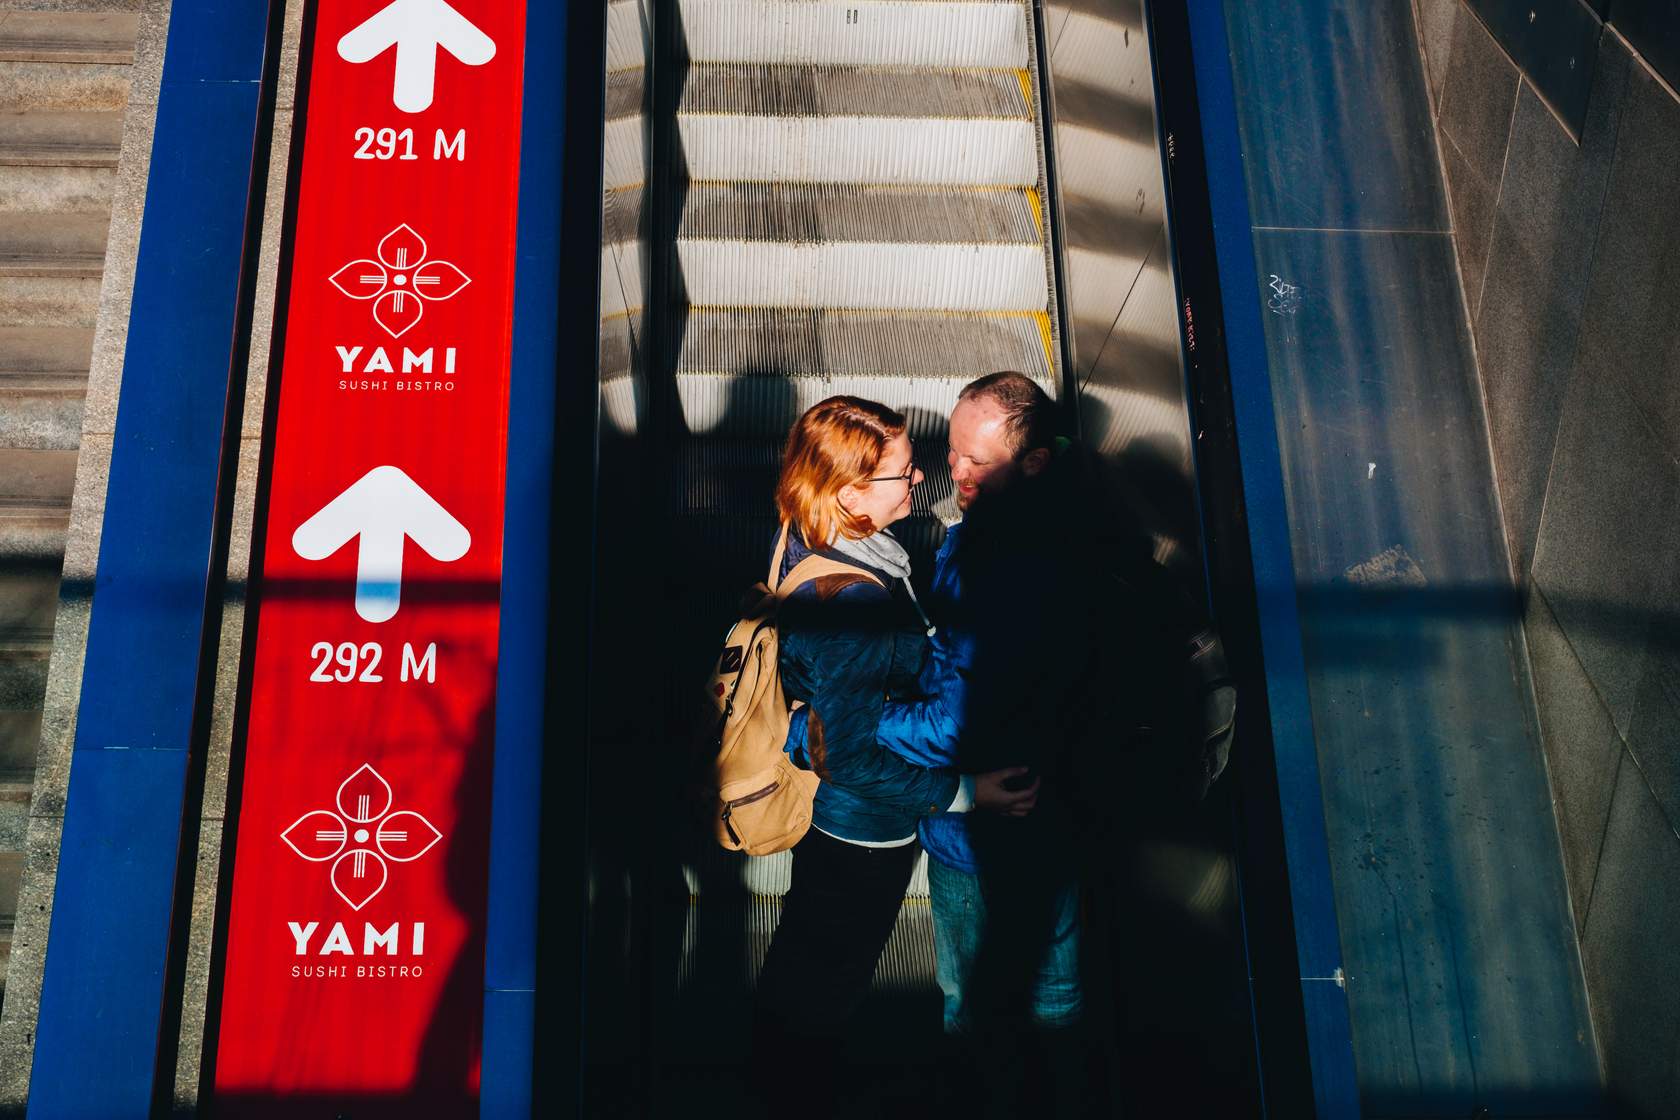
While some scenes may be more spontaneous and not allow for strict planning, having an idea of what you wish to capture can allow you to position yourself to still use the lighting to your advantage.
In this photo, for example, there was less than a minute between seeing the scene unfolding and losing the chance to get the shot.
Prior planning of the lighting to keep a consistent look across a series of photos taken throughout the year allowed for an unplanned shot that fit thematically with other shots taken months apart.
The most basic question of lighting: Where do you want the light to hit?
Knowing the answer to that question will dictate where your lights need to be, or for a natural light environment where (and when) you need to position yourself.
Do you want a dark, low-key portrait with Rembrandt lighting? You’ll need a single light source that’s highly directional, either from a grid or flags, with the light positioned based on where the model is facing to get the shadows on the face in the correct place.
Use the diagram below to try out some different lighting options to see the results.
Studio diagram
Simulated result
Add lights and modifiers to see the effect on your subject.
If you plan how you want the light to look, working back to where you need to place lights or position your subject becomes easier and involves less trial to get the scene you want.
If you plan how you want the light to look, working back to where you need to place lights or position your subject becomes easier and involves less trial to get the scene you want.